


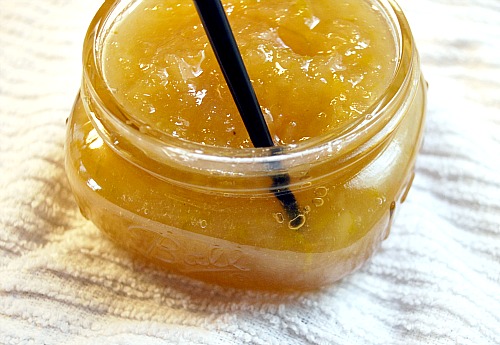
Lemony-Ginger Pear Preserves
Use green unripe (or slightly ripe) Bartlett pears for this recipe. You want the pears to hold their shape not only when they're shredded, but when they're in the preserving pan and in the jar....and later, on your toast!
These 4 flavors are so intriguing together. The subtle sweetness of pears are exactly what's needed to deliver the sweet-tart spicy delight of lemons & ginger combined. If you like lemons and love ginger, you're going to absolutely adore these pretty preserves.
And guess what? As is the case with most of my preserving recipes....no pectin necessary!
Makes ~ 4 half pints
- 2 lbs (about 4) green, mostly unripe Bartlett pears
- 2 lemons, zested & juiced (approx. 1/3 cup of juice)
- 2 cups granulated sugar
- 2/3 cup candied/crystallized ginger root, coarsely chopped (4 ounces)
Note: Prepare lemons first, because you'll want to be able to pour the lemon juice over the pears (in the preserving pan) as soon as possible after you shred them to prevent oxidation. Oxidation is what causes browning, which isn't harmful, but you still want to prevent it for flavor, texture and esthetic reasons.
Next prepare canning jars and keep hot until ready to use; prepare lids according to the manufacturer's instructions.
1.) Zest lemons, and set aside lemon zest, then squeeze juice from lemons. Tip: Rolling the lemons on the counter firmly before juicing will soften them and enable you to extract the most juice.
2.) Wash, then quarter and core pears, and run them through the food processor fitted with a shredding blade. (If you are going to double this recipe, either work very quickly or do this in two separate batches to prevent the shredded pears from browning before you can get them into the preserving pan and combined with the lemon juice.)
3.) Combine pears, lemon juice, and lemon zest in a heavy-bottom non-reactive pan, then add sugar and chopped ginger. Stir together just enough to combine all ingredients.
4.) While stirring gently, bring to a boil over medium-high heat just until sugar is dissolved, which should only take a few minutes, then reduce heat to a simmer.
5.) Simmer for approximately 20-30 minutes, or until pears have softened slightly but the syrup has thickened. You want the shredded pears to still be a bit firm so they hold their shape in the preserves.
6.) Once desired thickness has been achieved, remove the preserving pan from the heat then spoon mixture immediately into hot sterilized jars, leaving 1/4" headspace if you plan to seal them in jars, or 1" headspace if you plan to freeze them instead.
7.) Look for any air bubbles in the jars and if you see any, use a chopstick or plastic knife to pop them, then wipe rims of jars spotlessly clean.
8. At this point you can cover jars with tight-fitting lids and either :
a.) store in the refrigerator for up to 3 months or
b.) store in the freezer for up to 6 months or
c.) you can create a shelf-stable preserve that won't need refrigeration by processing. Just follow the next 2 steps:
11.) Wipe rims clean, place lids atop jars, then screw on bands until they're finger-tight.
12.) Process for 10 minutes in a Boiling Water Bath.
Find more delicious pear recipes at USA Pears!
Step-by-step photos of the Lemony-Ginger Pear Preserves process
 Brook Hurst Stephens